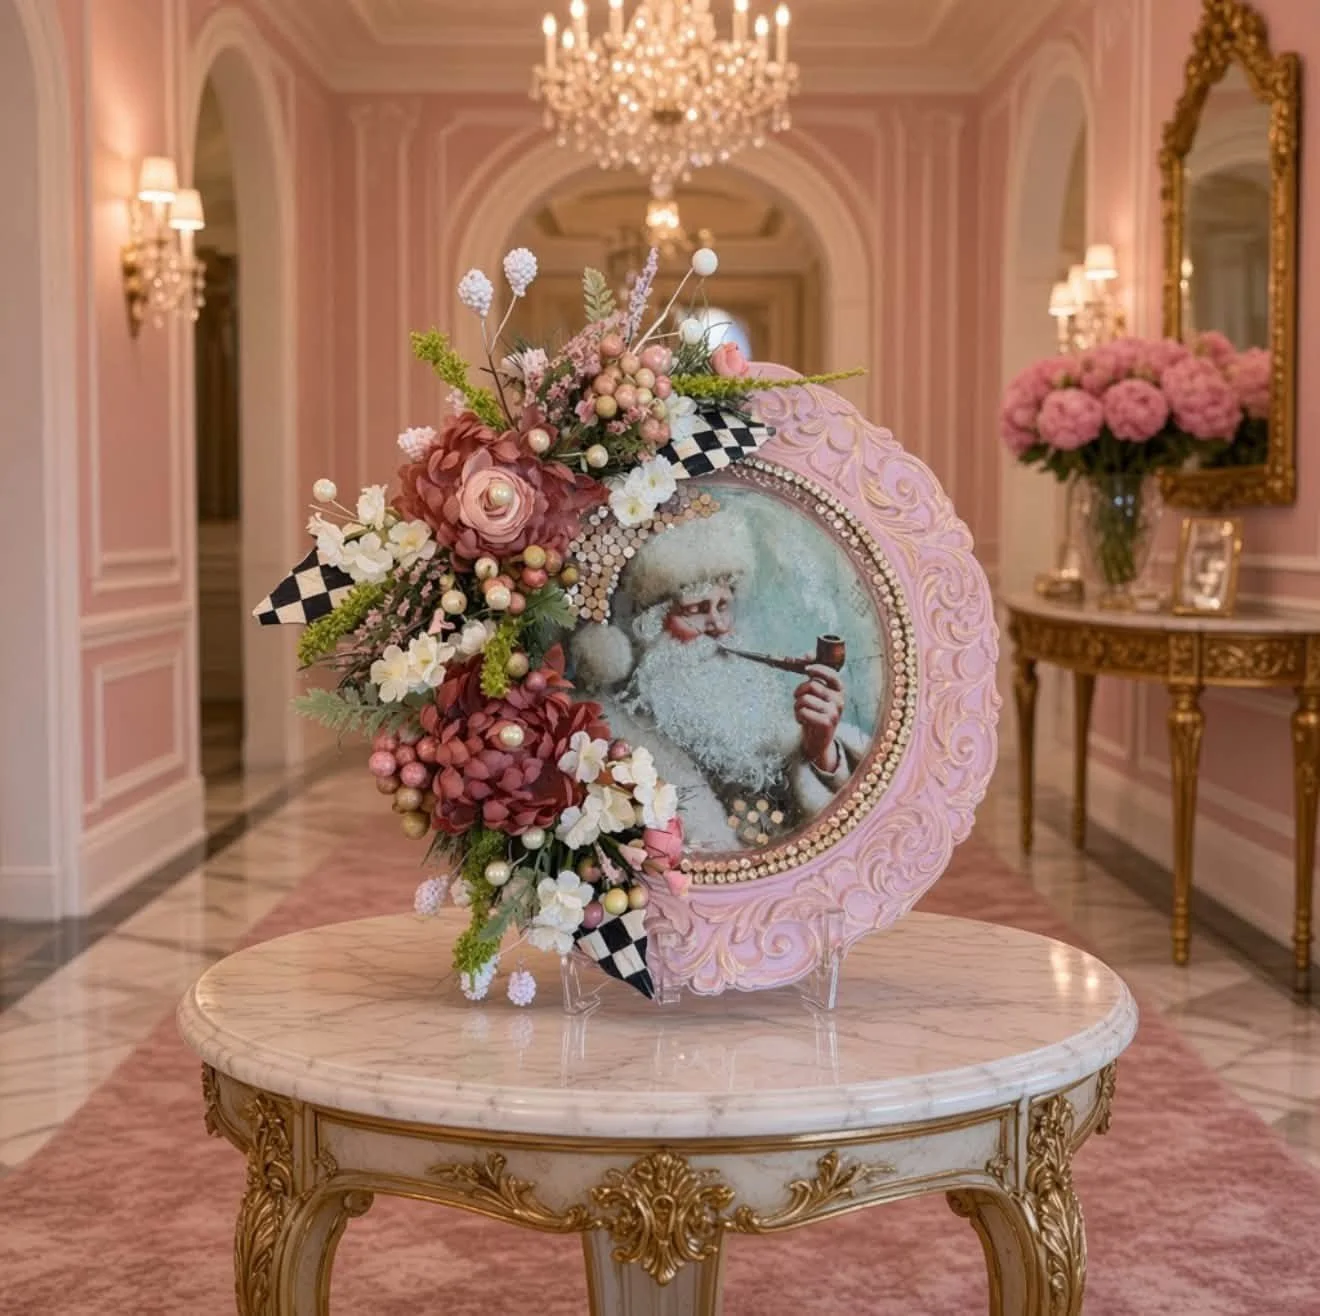
Vintage Pink Santa Charger
The first Christmas project of the season starts with something most of us already have a stack of somewhere in the house: plain charger plates. Debi picked up a set of six on Amazon for under $20, and rather than leaving them as-is, decided to turn one into a vintage pink Santa piece — complete with decoupage, rhinestones, antiquing, and a healthy dose of glitter.
Prep starts the way most of her painted pieces do: a coat of gray Dixie Belle bonding primer first, since there's no telling what factory finish is on a charger straight out of the box. From there, the inside gets a white base coat so the decoupage colors stay true, and the outside gets a single coat of DecoArt's Deco Earth paint in Dusty Rose — no mixing required.
A fingernail, a cutout, and some troubleshooting
The Santa design itself is a rice paper print from Secret of Decoupage, sized and fit directly onto the charger using nothing more technical than a fingernail. "So as always, I'm going to use my fingernail, which I know that's not cool. Well, I always do. It's not cool, but it works perfectly," she explained while pressing the pattern into place before cutting it out — since the design fit the charger so well, there was no need to feather the edges the way she normally would.
The paper did bleed slightly while being decoupaged with Mod Podge Multi, a detail worth knowing if you're trying this with rice paper for the first time. A few workarounds came up in the moment — heat-setting the paper first, or spraying it with a fixative, hairspray, or lacquer before decoupaging — any of which should help keep the ink in place.
Turning Santa pink
Santa's original outfit comes printed in red, which didn't fit the vintage pink vision for this piece at all. Rather than repaint it, the solution was to bedazzle straight over it. "Now, don't let the... Right, now I know you're thrown off by the red. Don't be. We're gonna — that's why — this is why we create our own stuff, because we're going to take that red right out of there. I don't want red. I want a pink Santa. Not a red Santa."
Champagne-colored 6mm rhinestones went on in small sections at a time with RNWHY jewelry glue, working across his hat, jacket, and vest until every trace of red disappeared under rhinestones. For the tiny gaps that the 6mm stones couldn't fill, smaller 3mm stones close in color filled in seamlessly — a detail Debi pointed out matters more than it seems: "You won't know the difference when you look at it, but you need to... I mean, but you would notice if you had some empty spaces."
“One of the reasons I love the wax pencils is this. All you have to do is sharpen it, and... this is all wax, so this thing will last me forever.”
Antiquing and a last touch of sparkle
To bring out the texture on the charger itself, chrome nail powder and clear wax stood in for the usual rub-and-buff — a thin layer of wax on a flat brush, dipped lightly in the chrome powder, then skimmed across just the raised areas to highlight them without flooding the recessed details in color.
The final touch is an ultra-fine glitter — the same kind used in the trend of dusting glitter onto wedding and holiday photographs — applied sparingly to Santa's beard and the curl of smoke above his pipe with a small spoon to control exactly how much came out. As she put it: "It's glitter, honey, not diamond dust."
The honest part: when resin doesn't go as planned
With the design finished, UV resin went on next to seal and shine the rhinestones. What happened instead became one of the most useful parts of the whole tutorial. The resin reacted with the rhinestones in a way nobody expected, melting their shiny coating and leaving them looking like clear glitter or sequins instead. "Resin makes rhinestones go clear. That would have been great information ten minutes ago, Diane," Debi said, laughing through the surprise.
“If anybody’s going to make a major blunder, it is me.”
Then, while curing under a large UV lamp, a second surprise showed up: the resin started lifting away from the plate along one edge. The working theory was that heat from the lamp affected the resin's bond to the plastic charger underneath it — but as Debi put it, mid-fix: "I make mistakes or I make blunders. So you don't have to." Rather than editing either moment out, both were shared exactly as they happened, along with the plan to let the piece cool, add a finishing ring of rhinestones around the edge, and report back on the fix.
Even mid-mishap, the consensus in the room was clear — it still looked beautiful, mistakes and all. Finished or still being fixed, a piece like this is exactly the kind of thing that belongs on an entryway table or a cake stand, welcoming people in with a little vintage holiday sparkle.
Supply List
Everything used for the charger, organized the way it comes together — prep and paint first, then decoupage, bedazzling, antiquing, and finishing.
The Charger & Prep
Chargers, set of sixUnder $20 on Amazon for all six
Dixie Belle Gray Bonding BossUsed as the bonding primer before any paint goes on
Paint — DecoArt Deco Earth, Dusty RoseA single, no-mixing coat for the true color shown here
Decoupage
Santa rice paper — Secret of Decoupagesecretofdecoupage.com — if the paper bleeds, try heat-setting it first or spraying with a fixative, hairspray, or lacquer
Mod Podge MultiUsed to decoupage the rice paper onto the charger
Bedazzling
6mm champagne rhinestonesCovers Santa's hat, jacket, and vest to replace the red
RNWHY jewelry glueApplied in small sections at a time
Wax pencilUsed to pick up and place each rhinestone — inexpensive and lasts a long time
Antiquing & Finishing
Chrome nail powder & clear waxHighlights the raised texture on the charger
Fine glitterThe same ultra-fine glitter used for the photo-glitter trend; applied with a small spoon to Santa's beard and the smoke
UV resinUsed to seal the rhinestones — see the write-up above for what happened and how it's being fixed
Florals and greeneryPulled from Debi's personal stash — any coordinating greenery, berries, or a bow works