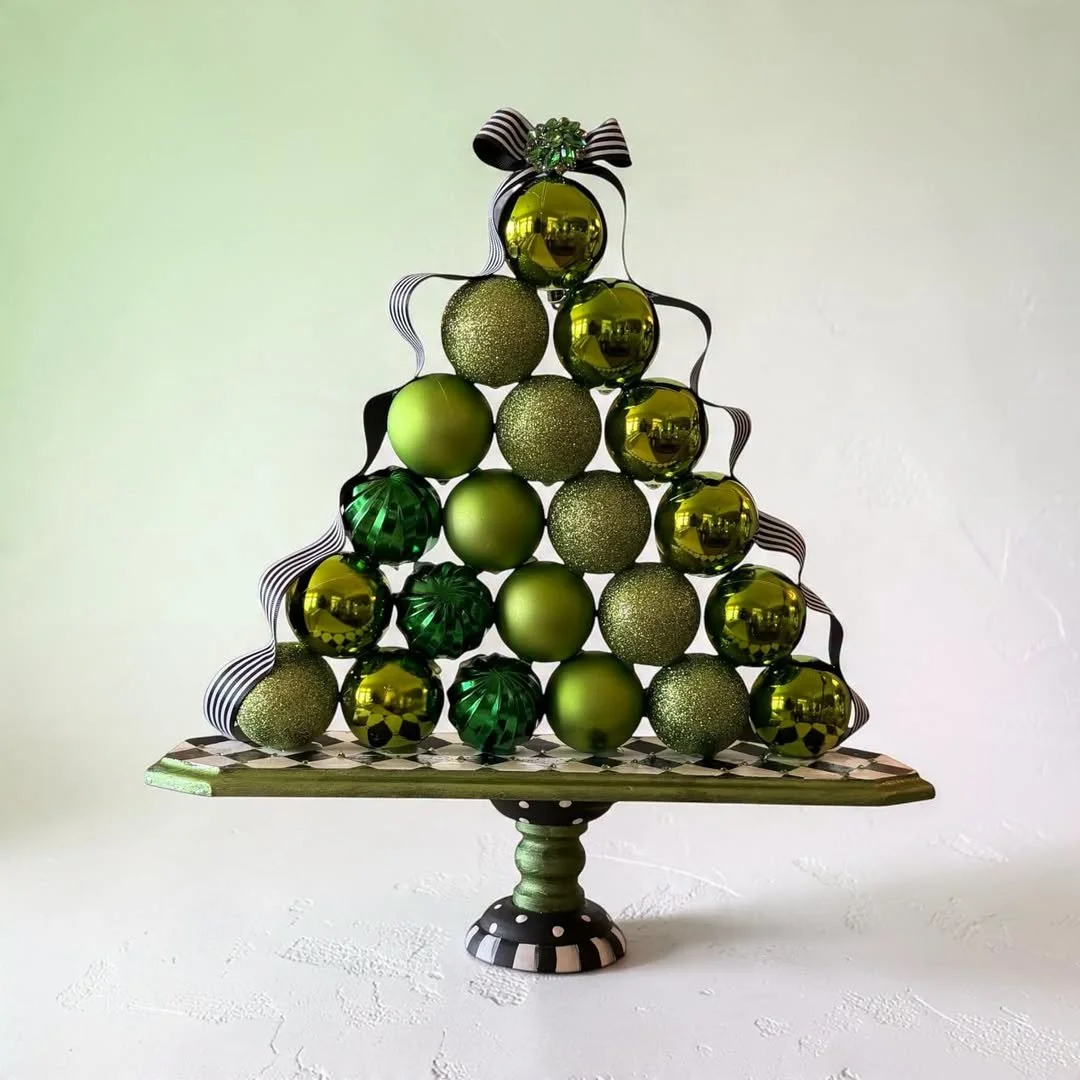
Fun & Easy Ornament Tree
Debi had been wanting to try this project for over a year after seeing it in a video, and this week she finally got to it: a mini ornament tree built entirely from an inexpensive wood board, a small candle holder, and a generous handful of mini ornaments in every shade of green. "This is a very inexpensive board from Hobby Lobby. You can get these anywhere. I mean it is just a cheap, you know, board sign, unfinished wood," she explained, setting it atop a candle holder from Michael's for the base.
The base is genuinely flexible — a plain wood sign, a scrap of one-by-two from the garage, a stack of secondhand books, even a set of jingle bells could all work as a starting point. For this build, a black-and-white diamond stencil from Dollar Tree dressed up the base before anything got glued together, though a plain farmhouse finish or a simple stain would work just as well.
A lesson learned the hard way
Not everything went according to plan, and that honesty is part of what makes this tutorial useful. After gluing the first ornament to the center of the base, Debi realized she needed to stencil the diamond pattern — which would have been far easier to do before anything was glued in place.
“My whole life is all about what’s the hardest thing I could possibly do today. That’s what I want to do. I want to do whatever’s hard.”
It became something of a running joke for the rest of the build. As she worked around the already-glued ornament to finish the stencil, she summed it up simply: "This is girl stupidity for sure." The fix: do the stenciling or any base decoration first, then glue — a tip worth remembering if you're following along at home.
From there, mini ornaments went on in rings, working outward and upward to build the cone shape. A trick that made a real difference: gluing a little extra glue onto both sides of the previous ornaments, rather than just the new one going on, gave each ring a much sturdier hold. The small cap on the back of each ornament doubled as a helpful guide, keeping everything from rolling around while the glue set.
The chrome powder that changes everything
Once the tree itself was built, attention turned to the base and candle holder — and chrome nail powder, the same kind used for metallic nail finishes at a salon. The one rule that makes or breaks the effect: "Here's the thing with chrome powder. You want the black — a black background on the chrome powder is what sets the chrome powder off so beautifully." A demonstration made the point unmistakable: the same powder applied over a lighter base looked flat and dull by comparison. "The black background sets it off beautifully."
The technique itself is simple — a small brush dipped first in clear wax, then in the chrome powder, applied directly over black paint. A blend of gold and silver chrome powder added extra dimension to the diamond pattern on the candle holder, proving the powder doesn't have to stay a single color to work beautifully.
Finding the right topper (the long way around)
Choosing a topper and finishing touches turned into its own mini adventure. A crown, a dove, a snowflake, a doorknob, and a star all got tried and rejected in turn before the group landed on something much simpler: a length of two-sided black-and-white ribbon, tied and rippled down the front of the tree.
Moss and spray snow both got a trial run too, and moss lost decisively. "That looks like horse poop," came the blunt verdict from the group chat — a little harsh, maybe, but accurate enough that the moss idea was dropped on the spot in favor of keeping things clean.
“Oh, you guys, this — this really is the way to go. But it’s just because I’m extra. If you’re not extra, just leave it alone.”
And that's really the heart of this project: it scales to whatever effort you want to put in. "You could do this green, or whatever color you want, on just a plain white base and it still looked good. You could do it on a wood, a stained wood base, and it would be gorgeous." The ribbon, the chrome powder, even the eventual plan to add real rhinestones to the polka dots on the base — all of it is optional polish on a tree that already works without any of it.
Supply List
Everything used for the ornament tree, organized the way it comes together — the base first, then the tree itself, then the chrome powder finish.
The Base
Board and candle holderFrom Hobby Lobby, glued together to build the base — any inexpensive wood board and small riser works
Dollar Tree stencilsOptional — used for the black-and-white diamond pattern on the base. Stencil before assembling, not after
Tite Bond Ultimate wood glueUsed for the long-term hold on the base
The Tree
Mini ornamentsFrom Hobby Lobby — a mix of green tones and finishes (solids, stripes, swirls) for visual interest
Hot glueUsed for the temporary hold while assembling each ring of ornaments
Chrome Powder Finish
Chrome nail powderApplied over black paint for a metallic effect — blend colors like gold and silver for dimension
Clear waxAny clear wax works (Turtle Wax or similar) — used to pick up and apply the chrome powder
Black paintBase coat needed before applying chrome powder for the best effect
Finishing Touches
Two-sided black-and-white ribbonThe winning topper choice — tied and rippled down the front of the tree
Also Seen in This Video
Bee's Knees collage bookFeatured in a bonus show-and-tell project from this week's member group