How to Transform a Thrift Store Purse with Mixed Media
There's something deeply satisfying about picking up a purse for a few dollars at the thrift store and turning it into something people stop you on the street to ask about. That's exactly what this tutorial is — a full, start-to-finish mixed media purse makeover that covers every technique you need to know, including a few things that will save you from some very costly (and heartbreaking) mistakes.
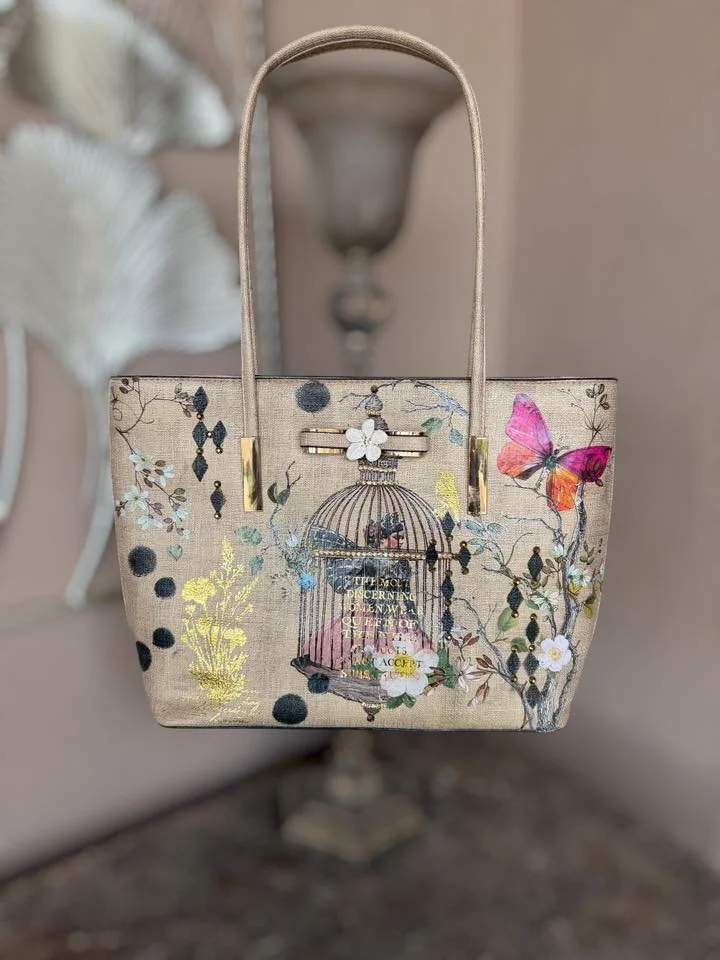
In this project, Debi takes a brand-new thrift store find and builds a layered, textured design featuring a lady inside a birdcage — surrounded by floral and gold IOD transfers, dry-brushed stenciling, and rhinestone bling placed strategically for maximum impact. Is it for everyone? Maybe not. Is it the kind of bag that makes people do a double-take? Every single time.
Here's what you'll learn in this tutorial:
Priming — and why you can't skip it. Every purse makeover starts with a bonding primer, and this video explains exactly which one to use and when. If your purse is red, burgundy, orange, purple, or any other deeply saturated color, you must use a stain-blocking bonding primer — not just any bonding primer. Debi learned this the hard way: dark dye hides perfectly until you apply your sealer at the very end, and then it bleeds right through everything. This one tip alone will save your project.
How to decoupage a figure onto a purse. Using pages from a cut-and-collage book, Debi cuts out a vintage-style lady, positions her inside an IOD birdcage transfer, and decoupages her down with Mod Podge Multi. You'll learn how to crop your figure, position it before it dries, and layer the transfer on top so it looks like the figure is actually inside the cage rather than sitting in front of it.
Working with IOD transfers. Iron Orchid Designs transfers are one of the most versatile tools in mixed media crafting — and this tutorial shows you exactly how to apply them to a vinyl purse. You'll see florals, bird cages, branches, butterflies, and gold lettering all go down in real time, including the tips that make the difference between transfers that cooperate and transfers that fight you.
Stenciling with a dry brush technique. Debi uses a small stencil brush, barely any paint, and a dry-brush pouncing method to add geometric diamonds and circles throughout the design. The key is to hit-and-miss — not covering everything — so it reads as intentional rather than overdone.
Sealing for longevity and that glow-up finish. Liquitex High Gloss Varnish is the sealer of choice here, and the transformation it creates is genuinely stunning. Everything that looked good separately suddenly coheres into one polished, intentional piece. Debi also explains what to expect when the sealer goes on — some transfers may lift or wrinkle briefly, and that's completely normal.
Rhinestone bedazzling — the finishing touch. Using T8000 glue, a precision syringe tip, a picker pen, and a rhinestone tray, Debi adds rhinestones in between the stenciled diamonds for a 3D effect that catches light from every angle. She also adds Stickles glitter glue to the butterfly's wings — carefully going between the birdcage lines so the design reads as layered depth rather than a flat collage. The result is dimensional, sparkly, and completely addictive.
This same technique works on tote bags, coin purses, wallets, vintage train cases, hat boxes, and more. Once you understand the layering process — prime, decoupage, transfers, paint, seal, bling — you can apply it to almost anything.
⚠️ Note: Any sales, events, or membership promotions mentioned in the video may no longer be current. Visit studiomdaz.com for the latest.
🛍️ Supply List
Some links may be affiliate links — thank you for supporting Studio MDAZ!
PurseThrift store find — check yours!
Bonding PrimerDixie Belle Clear Bonding Boss → amazon.com
Decoupage FigureCut & Collage Book: Goddess, Please! → amazon.com
IOD TransfersMenagerie, Lost Garden & Gilded Gold → vintageretailtherapy.com (Use code: SISTERHOOD for a discount!)
Bling Trimamazon.com
Gold Cabochonsamazon.com
ealerLiquitex High Gloss Varnish → amazon.com
Decoupage MediumMod Podge Multi (Gloss)
Rhinestone GlueT8000 or Gem-Tac with precision syringe tip
Picker PenRhinestone applicator — available on Amazon & Temu
Rhinestone TraySmall sorting tray (often included in rhinestone kits)
Glitter GlueStickles glitter glue
Paint MarkersPosca Paint Markers
Stencil BrushSmall, dry-brush style
Wire Cutters/NippersFor removing cabochons from their backing
Want more projects like this one? Debi goes live 3 times a week inside the Sisterhood Membership — exclusive tutorials, a community of makers, and projects you won't find anywhere else. Just $25/month.
👉 Join here: checksavvysisters.com/join