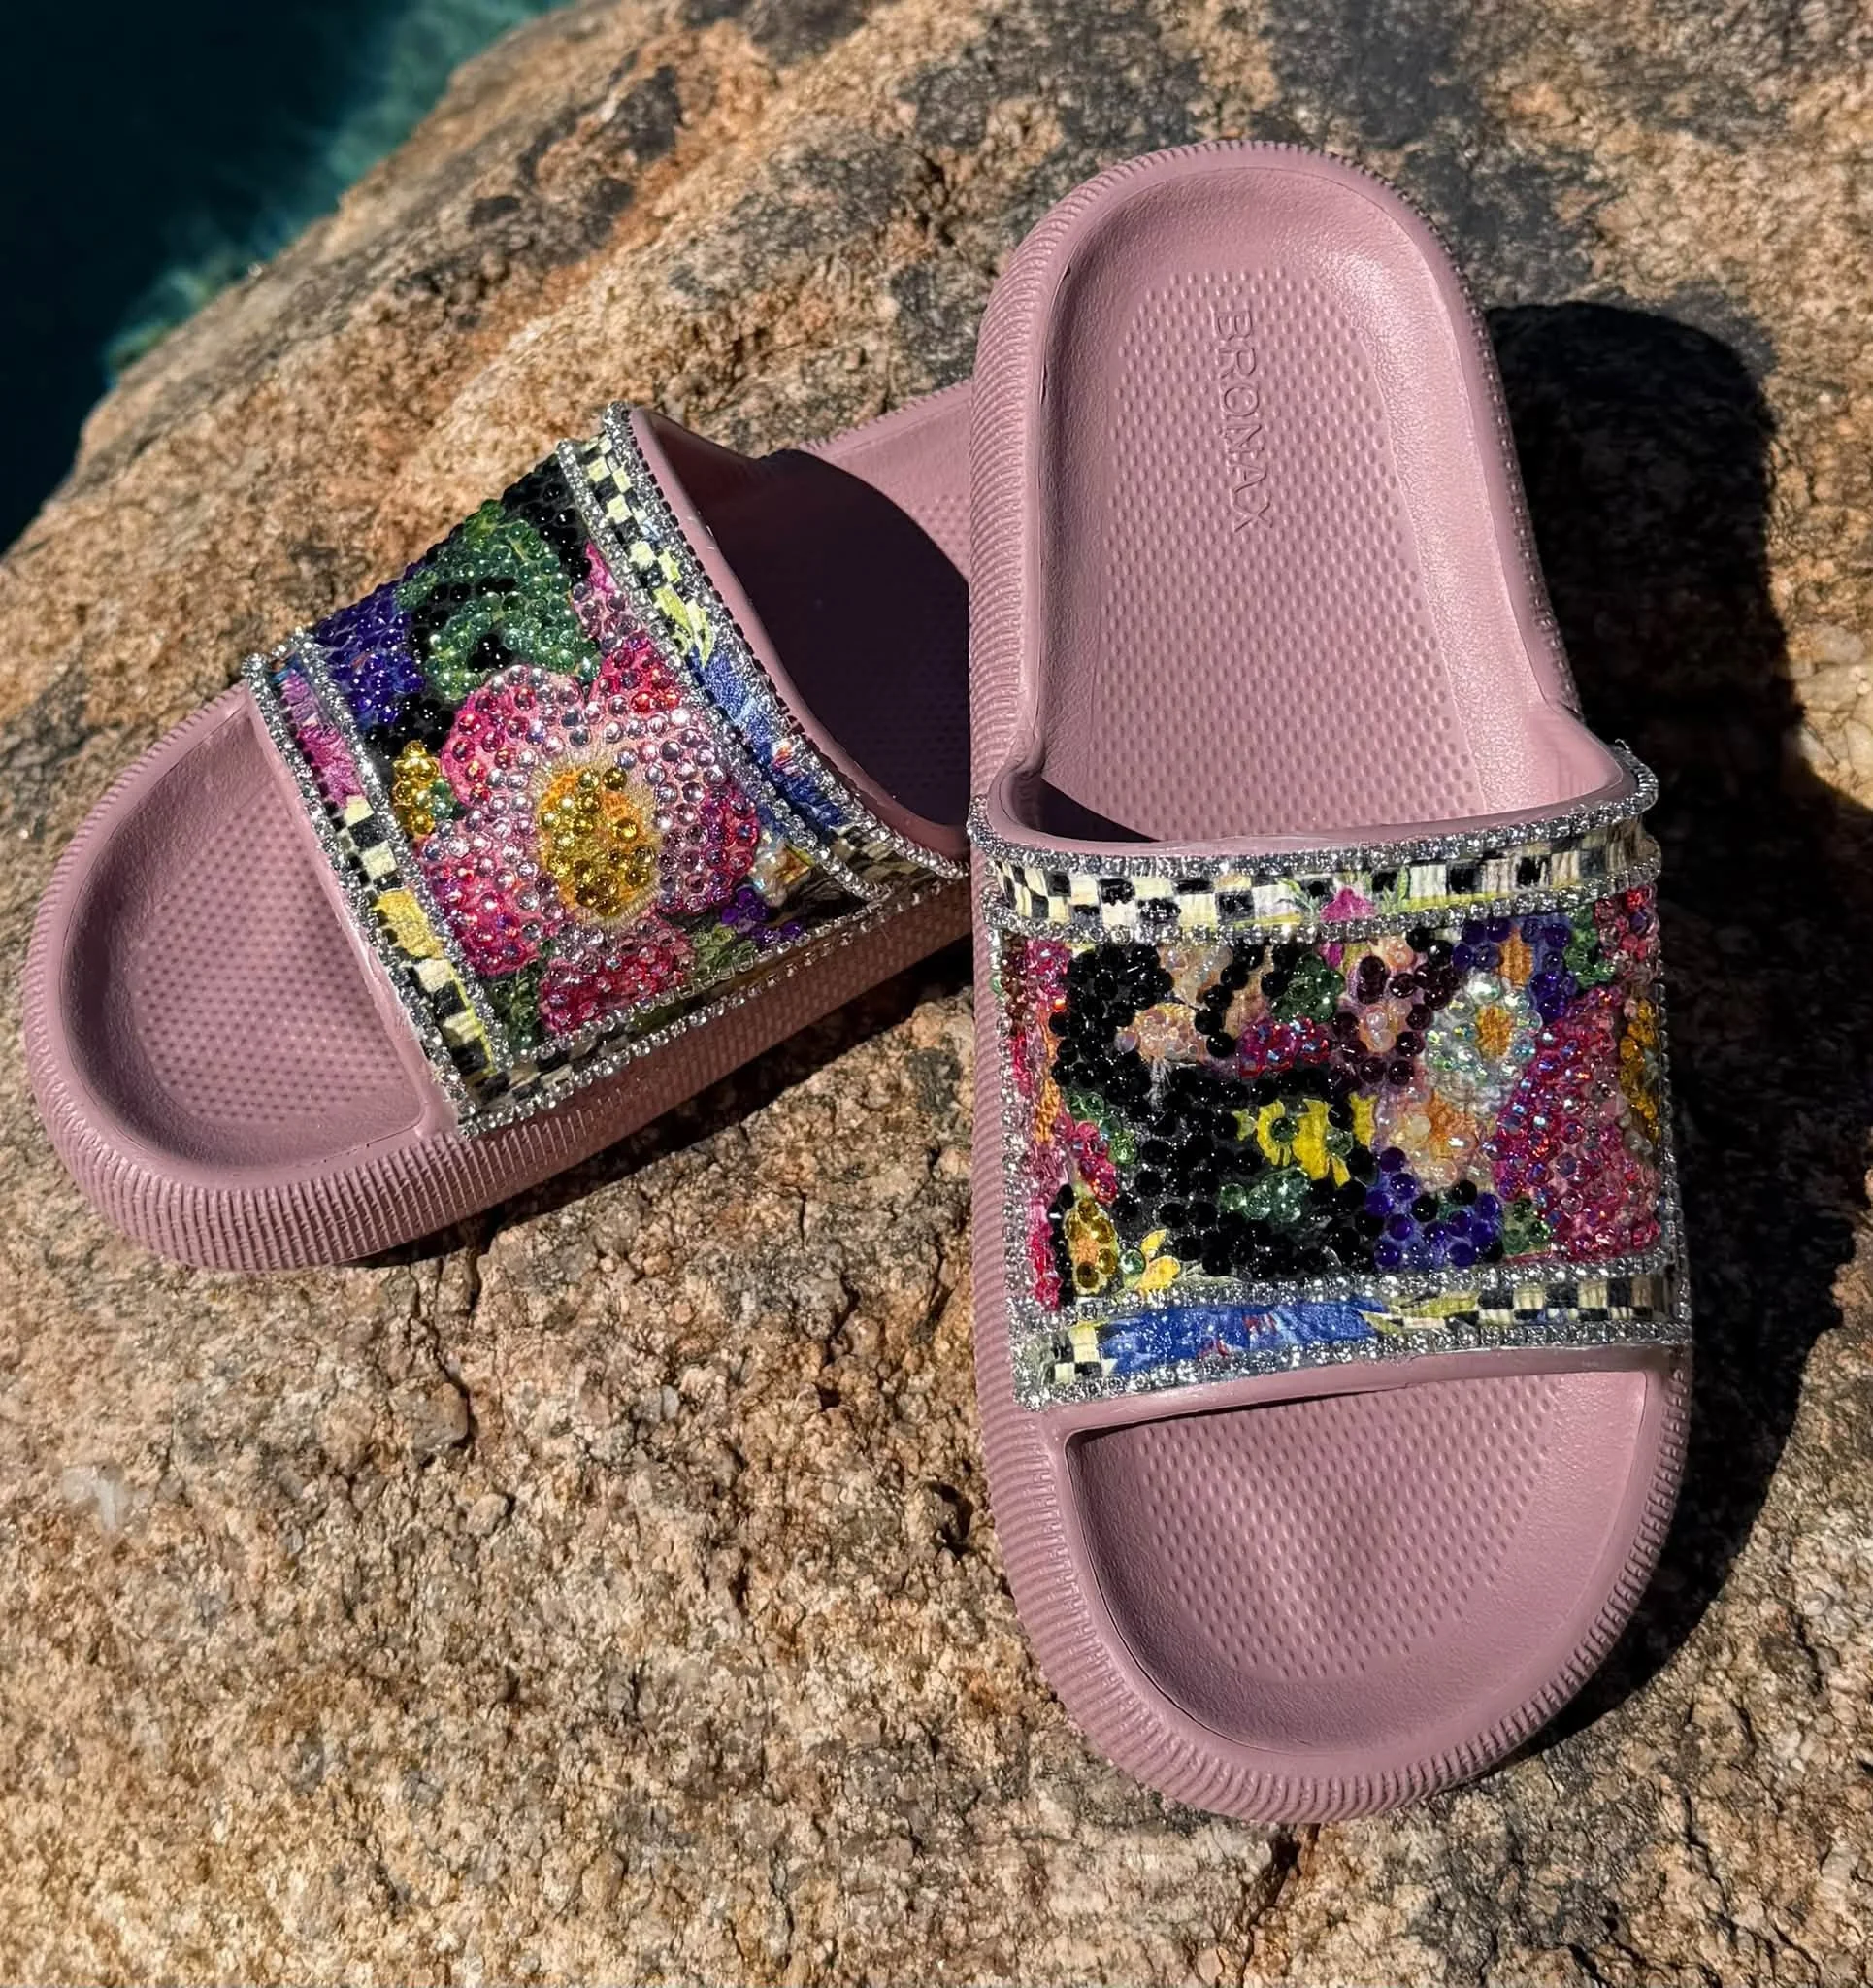
Designer-Inspired Bedazzled Slippers
Debi's back after a rough few weeks, and she's easing back in with one of her favorite kinds of project: taking something plain and completely transforming it. This time it's a pair of $20 garden shoes from Amazon — not the comfiest shoes in the world, by her own admission, but a perfect blank canvas for bedazzling.
The process starts the way most of her painted projects do: a coat of gray bonding primer first, left to dry overnight, followed by two coats of base paint. Her go-to white for this kind of project is Benjamin Moore OC-117, bought by the gallon at the hardware store — not a stark white and not a yellowed white, just a clean, true white that covers well.
A napkin does double duty
Once the base coat is dry, the real transformation starts with something most people already have a drawer full of: a cloth napkin. Debi used a McKenzie Childs Flower Market napkin, decoupaged directly onto the shoe with Mod Podge. One detail worth knowing if you try this yourself — decorative napkins are usually two-ply, and only the printed top layer should go down, so it's worth gently separating the plies before you start gluing.
“I’m using the napkin design to bedazzle so that I don’t have to hurt my brain to try and come up with some kind of fun design.”
That's the real trick behind this whole project. Instead of staring at a blank shoe and guessing where rhinestones should go, the napkin's own floral print becomes the map — every petal and leaf is already laid out, already colored, already balanced. All that's left is to follow it.
Trim first, then the bedazzling begins
Before any rhinestones go on, a black-and-white check trim gets glued around every edge of the shoe, cut from the leftover border of the same napkin. It's a small step, but it's the one that frames the whole piece and keeps the eye moving around the shoe instead of just landing in the middle.
From there, it's a slow build, color by color. Debi works in small sections — since the glue dries fast — picking up each rhinestone with a wax pencil (a cheap tool that lasts essentially forever, so there's no need to buy the fancier gadgets) and following the napkin's own shading: darker stones in the shadowed parts of the design, lighter ones where the print is brightest, so the finished piece reads as genuinely dimensional instead of flat sparkle.
“Look what a difference it makes. When you get the black on, that’s when everything just pops.”
The black is saved for last and it's the step that pulls the whole design together — suddenly the outline reads clearly against all that sparkle, and the shoe stops looking like "bedazzled" and starts looking intentional.
Sealing it in — and why not resin this time
Normally resin is the go-to for locking down bling on a flat surface, but shoes flex, and flexing resin can crack. So instead, the finished design gets a coat of diamond art sealer brushed on with an old paintbrush. It takes a little longer to dry than resin, but it holds every rhinestone in place, adds a layer of shine, and won't crack the way a rigid resin coating could on something that bends with every step.
The same approach works on literally any pair of shoes — tennis shoes included — which makes this less of a one-time project and more of a repeatable technique: pick a napkin you love, decoupage it on, and let the print do the design work for you.
Bonus projects from the same session
While one shoe cured, Debi also showed off two quick side projects built on the same bedazzling skills. The first was a rhinestone Christmas tree made on a thrifted frame — a $3.99 Rachel Zoe frame from Marshalls, with a simple pine tree shape stenciled onto black paper, cut out, and filled in with an assortment of rhinestone sizes and tones from a pre-sorted kit. It's an easy project to scale up for a group: cut a stack of tree shapes ahead of time and let guests at a fall or Christmas gathering fill in their own.
The second was a reveal of eleven locally made, designer-inspired 3D purses — styled after brands like Chanel, Louis Vuitton, and Prada — that Debi is in the process of bedazzling, repainting, and finishing with new fabric accents for display pieces around the house.
Supply List
Everything used for the shoe transformation, organized the way it comes together — prep first, then decoupage, then the bedazzling and sealing.
The Shoes
Garden shoes used in this projectAround $20 on Amazon — not the comfiest on their own, but a great blank canvas for bedazzling
Slippers shown at the start of the videoFrom Temu, already bedazzled: amzn.to/4jdBPNK and amzn.to/4y8mjHM
Prep & Paint
Gray Bonding BossBonding primer, applied first and left to dry overnight
Benjamin Moore OC-117Base coat paint in flat or matte — available at Ace Hardware or your local paint supplier
Decoupage
McKenzie Childs napkin (Flower Market print)Split the two-ply napkin before decoupaging; if it's not on Amazon, it can be ordered direct from McKenzie Childs — any favorite napkin pattern works
Mod Podge MultiUsed to decoupage the napkin onto the shoe
Bling trimBlack-and-white check trim, glued around every edge before bedazzling begins
Bedazzling
Bedazzle rhinestonesA mix of sizes and tones, placed to follow the light and dark areas of the napkin print
Wax pencilUsed to pick up and place each rhinestone — inexpensive and lasts a long time
GlueB7000, E8000, Gem Tac, or Aileen's Ultimate all work — a precision tip makes it much easier to apply
Finishing
Diamond Art SealerBrushed on over the finished design to lock in every rhinestone and add shine — used instead of resin since resin can crack on a shoe that flexes
Some links may be affiliate links — thank you for supporting Studio MDAZ!